In my previous post I wrote about my first experiences filming on a 360 camera. Here, I want to follow up with what happened when I tried to edit - on Final Cut X.
The first question: how do you get the right file to edit?
It might seem best to take the SD card from the camera, insert it into the side of your laptop and copy the original files across. But that doesn't work: you'll find MP4 files to import on the SD card, but sadly, they won't play on Final Cut.
That's because, as I mentioned in the previous post, the process of saving the files from the camera onto the phone also converts them into a readable 360 format - and those are the files you want to edit with.
To get access to the files easily on your laptop, you can use Android File Transfer on the laptop. Then, when you plug the phone into the laptop, you'll see a file structure view of the phone memory and will find the files you're looking for in the DCIM folder. Transfer those files to your laptop and import into Final Cut.
Now you'll be able to view the shots - not in 360 but in a panoramic view, which is good enough to identify the cut points you want, plus, of course, you'll be able to hear their audio to help with that.
From here on, you're editing just as you would with non-360 footage. You can even add titles and effects, as I tried here, combining my two experimental shots:
A couple of things haven't quite worked as I expected:
Somehow the 360 sphere has turned into the inside of a cylinder, with a black hole at the top where the sky ought to be.
And second, the titles are much bigger than I was expecting. On reflection, I think that's because I was judging them, as usual, in relation to the width of the editing screen, whereas here the shot, in its panoramic view, was much wider once it came back into 360 mode.
Having made your edit, the next job is to export the finished product. I first made a .mov file, which I used my Android File Transfer to put back onto the phone, so I could view through the Gear headset. But it turns out that Gear doesn't recognise .mov files, so that was no good.
So I went back to my laptop and converted it to an mp.4, using Mpeg Streamclip, and put that on the phone. Now it could be recognised and played, but it wasn't in 360.
One more process was required. It involves 'injecting' data into the file, to label it as 360. It's explained in this page of YouTube help. The important part is downloading and using the Spatial Media Metadata Injector. It's actually very easy: just check a box to say you're going to be showing it a 360 video, and it will remake the file to include that information.
Now if you view that file on your phone, you can have the full 360 experience on a headset with something you have edited, or you can upload to YouTube, as I did with the video above, and watch it on your phone.
I'm not sure how to avoid the cylinder problem with 360 editing, but apart from that, the process from filming to edited video worked pretty well once I'd understood what I was trying to do.
Sunday, February 26, 2017
Saturday, February 25, 2017
Filming in the round
I have been experimenting with 360 filming, using the Samsung Gear 360 camera linked to a Samsung Galaxy phone.
Here are some of the things I've learnt:
Camera position is everything. When you film with a conventional camera, where you place it is just one of many decisions that will define the shot. (Along with framing, choosing the lens and focus for instance.) In 360, camera position is almost the only decision you need to make before pressing record: you can't even decide where to point it, of course.
If you're filming in 360, you'd better offer 'value for money' by having different things happen in as many different directions as possible, requiring the viewer to make use of their ability to track around the picture.
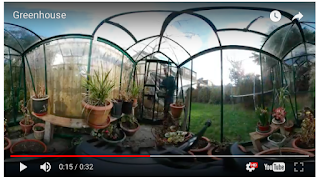
This is the first of my experiments, filmed with that in mind:
NB: If the video still frame above is the first of the images below, then you're viewing in a browser that doesn't support 360 video play on YouTube (e.g. Safari). Try Chrome, where you should see the second image below, which is how it looks when it is going to play in 360.
When you're watching, you can navigate around either using the pointers on the button top left, or by holding the mouse (or your finger on a touch screen) and dragging the picture round.
Here's my second experiment, where I attached the camera to my bicycle like this:

This demonstrates a couple of things not to do:
First, if you view this through the Samsung Gear Headset, for the full immersive experience, it will make you feel distinctly sea-sick. Apparently that's caused by the camera tilting horizontally, as when the bicycle goes round the corner. If you want a happy audience, stay level.
Second, if you don't want to look like a grim, looming giant, put the camera at eye-level (and smile):
In those shots, I was controlling the camera (recording and viewing live what it was seeing) through a linked Samsung Galaxy phone.
So then the question is, how do you view what you've filmed? Well, first you have to save the shot from the camera, where it's recording, onto the phone, which takes a little while, depending on the length of the shot. In the process, a conversion from the original file happens.
The simplest option for viewing, playing back in the phone itself, isn't as easy as you might expect - unless I'm missing something.
The shots are saved to the phone's Gallery, as on other Android devices. But if you view from there, or through the Gear 360 app, you can't get the full 360 experience, moving the phone round to see different parts of the view. Instead, there's a choice between: Dual view (the two 180 cameras in the Gear shown as two corrected rectangles on a split screen); Panoramic (where the left side of the picture joins up with the far right side like a map of the world); 360 view (which is like a big distorted sphere); Stretched; and Round view (below), which looks like this:

Interesting, but not very useful.
To get the full, immersive 360 experience, you need to insert the phone into the back of the Gear VR headset. Before doing so, you need to go back to the Gear 360 app, and touch "View on Gear VR", which will prompt you to insert the device into the headset.
In my experience, it often takes a few attempts at putting the phone into the headset before you hear little pings on the headset that tell you it's ready for you to navigate with its controls on the right side, to find the Gallery, and press play on your video.
The immersive experience is good, giving you the ability to 'look' in different directions convincingly, although deciding to do so doesn't come naturally when we're so used to just staring ahead at video. There needs to be real motivation to keep a viewer's attention on what the director wants the audience to be seeing. Otherwise, they'll just be using the 360 opportunities to stare idly at irrelevancies to pass the time, like bored children in class.
So how do you make your video viewable to more people than can have access to your phone and a headset that takes a lot of fiddling to make work?
One answer is YouTube, and the Samsung phone lets you upload direct, which is handy. But do so from inside the Gear 360 app. If you upload direct from Gallery, YouTube won't recognise that your video is 360, and will just show it in the panoramic form, which looks weird.
Once you've uploaded, if you open YouTube on your phone, you'll get the proper effect, where you can 'look' at different things by tilting and rotating the phone.
In the next blog, I look at how to edit your 360 videos.
If you want to find out about the very minimalist controls on the camera, here's a good video that someone has kindly made.
Here are some of the things I've learnt:
Camera position is everything. When you film with a conventional camera, where you place it is just one of many decisions that will define the shot. (Along with framing, choosing the lens and focus for instance.) In 360, camera position is almost the only decision you need to make before pressing record: you can't even decide where to point it, of course.
If you're filming in 360, you'd better offer 'value for money' by having different things happen in as many different directions as possible, requiring the viewer to make use of their ability to track around the picture.
This is the first of my experiments, filmed with that in mind:
NB: If the video still frame above is the first of the images below, then you're viewing in a browser that doesn't support 360 video play on YouTube (e.g. Safari). Try Chrome, where you should see the second image below, which is how it looks when it is going to play in 360.


When you're watching, you can navigate around either using the pointers on the button top left, or by holding the mouse (or your finger on a touch screen) and dragging the picture round.
Here's my second experiment, where I attached the camera to my bicycle like this:

This demonstrates a couple of things not to do:
First, if you view this through the Samsung Gear Headset, for the full immersive experience, it will make you feel distinctly sea-sick. Apparently that's caused by the camera tilting horizontally, as when the bicycle goes round the corner. If you want a happy audience, stay level.
Second, if you don't want to look like a grim, looming giant, put the camera at eye-level (and smile):
In those shots, I was controlling the camera (recording and viewing live what it was seeing) through a linked Samsung Galaxy phone.
So then the question is, how do you view what you've filmed? Well, first you have to save the shot from the camera, where it's recording, onto the phone, which takes a little while, depending on the length of the shot. In the process, a conversion from the original file happens.
The simplest option for viewing, playing back in the phone itself, isn't as easy as you might expect - unless I'm missing something.
The shots are saved to the phone's Gallery, as on other Android devices. But if you view from there, or through the Gear 360 app, you can't get the full 360 experience, moving the phone round to see different parts of the view. Instead, there's a choice between: Dual view (the two 180 cameras in the Gear shown as two corrected rectangles on a split screen); Panoramic (where the left side of the picture joins up with the far right side like a map of the world); 360 view (which is like a big distorted sphere); Stretched; and Round view (below), which looks like this:

Interesting, but not very useful.
To get the full, immersive 360 experience, you need to insert the phone into the back of the Gear VR headset. Before doing so, you need to go back to the Gear 360 app, and touch "View on Gear VR", which will prompt you to insert the device into the headset.
In my experience, it often takes a few attempts at putting the phone into the headset before you hear little pings on the headset that tell you it's ready for you to navigate with its controls on the right side, to find the Gallery, and press play on your video.
The immersive experience is good, giving you the ability to 'look' in different directions convincingly, although deciding to do so doesn't come naturally when we're so used to just staring ahead at video. There needs to be real motivation to keep a viewer's attention on what the director wants the audience to be seeing. Otherwise, they'll just be using the 360 opportunities to stare idly at irrelevancies to pass the time, like bored children in class.
So how do you make your video viewable to more people than can have access to your phone and a headset that takes a lot of fiddling to make work?
One answer is YouTube, and the Samsung phone lets you upload direct, which is handy. But do so from inside the Gear 360 app. If you upload direct from Gallery, YouTube won't recognise that your video is 360, and will just show it in the panoramic form, which looks weird.
Once you've uploaded, if you open YouTube on your phone, you'll get the proper effect, where you can 'look' at different things by tilting and rotating the phone.
In the next blog, I look at how to edit your 360 videos.
If you want to find out about the very minimalist controls on the camera, here's a good video that someone has kindly made.
Subscribe to:
Posts (Atom)